Ionos Webmail Setup | Registration & Password Reset for 1&1 Webmail
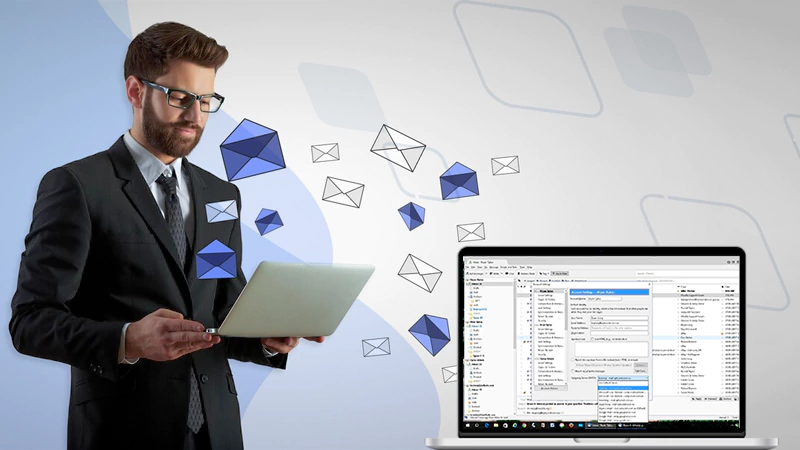
The Ionos webmail is an email hosting service offered by the firm 1&1. It has a very interactive user interface and provides you with features like spam protection, adding a signature to webmail, advanced email filtering, and setting up email forwarding, appointments, calendars, and folders.
Despite the fact that the 1&1 webmail service is popular, many are still confused about the right process to do the setup.

Well, your confusion ends here. The following write-up will help you clearly understand the process of registration, login, password reset, and overall setup of this service.
So, to know all this and more, let’s jump right into the article below!
How to Register for 1&1 IONOS Webmail?
Before we move on to the steps to see how to do an IONOS Webmail login, let’s first have a look at how you can register for this webmail. Well, the process is pretty simple, you just have to follow the instructions given below to have a 1&1 IONOS Webmail account:
- First off, open the browser on your system, and go to the IONOS page – https://www.ionos.com/office-solutions/create-an-email-address.
- On the page that appears, scroll down till you see the Email Plan section. And, switch to the IONOS Email tab.
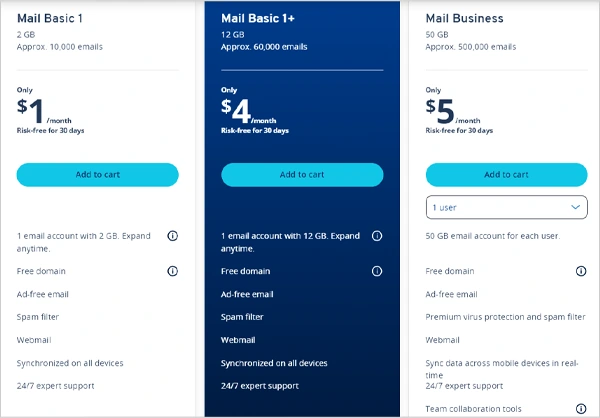
- Then, you will see three IONOS email plans; select a plan in order to create a 1 and-1 webmail email account.
- Then, click on the Continue button.
- On the next screen, you will see a form where you have to fill in your required information and follow some on-screen instructions.
- After that, you will be directed to the payment page. There, make the payment as required by the plan you selected. And, now you have access to your IONOS 1&1 Webmail account.
Once the payment is done, you will now have your IONOS Webmail. You can now use the credentials that you created to log into your account. This service even allows you to set up an email without phone number.
Steps to Log into IONOS Webmail
The process of logging into the 1&1 webmailer service is easier than other competitor services like Netaddress email login, TalkTalk My Mail login, ATT email, or TWC Webmail.
Just like any other email service, in order to do the IONOS email login, you just need the email address and password of your email account. However, as stated before, users of this email service are a little confused in regards to the official webpage to access the email.

But, don’t you worry, given below is the official link to access the 1and1 IONOS login page, and the steps to get into your account:
- Begin by opening the browser and going to the IONOS Webmail login page on this link – https://id.ionos.com/identifier.
- There, you will see the login form. First, enter your email address in the first field.
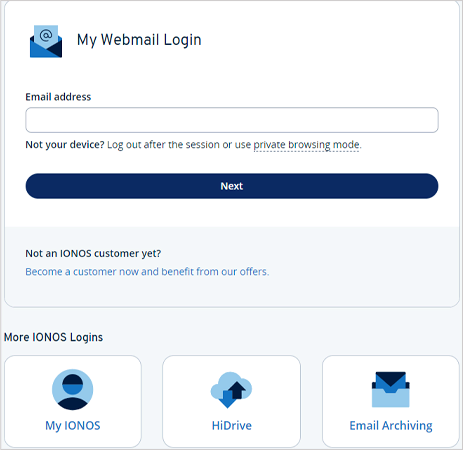
- Then, in the next field, type in your 1&1 webmail password.
- Finally, click on the Login button and you will enter your IONOS Webmail account.
After you have followed the given instructions, your IONOS email sign-in will be done! However, if you face any issue with the webmail, you can refer to the Webmail Problems and Solutions guide.
Setting up IONOS Email on Different Devices
Upon opening up the browser, go to the One & one email login page, fill in your credentials, and then enter your account. It is a bit of a task and a time-consuming one. But, you can save this time of yours by adding your email account to an email client, like Outlook, Apple Mail, etc., on your system or mobile device.

Listed below are the steps to take the same on some of the popular email clients:
iOS:
If you want to set up the 1and1 email webmail on an iOS device, you can easily do this in a very few steps. These steps are mentioned below.
- To begin with, open the Settings app on your device.
- Inside the Settings app, tap on the Mail section.
- Tap on the Accounts option on the following screen.
- Then, select the Add Account option.
- Next, you will see the list of email service providers. You won’t find one & one email service there, so, tap on Other.
- After that, fill in the following information and then, tap on Next:
- Name: Enter your name which will be displayed on all outgoing emails.
- Email: Your email address of the 1&1 webmail service
- Password: The password you set when creating your email account.
- Description: Fill up the field with a description of your account. This information is solely needed to distinguish your account from others.
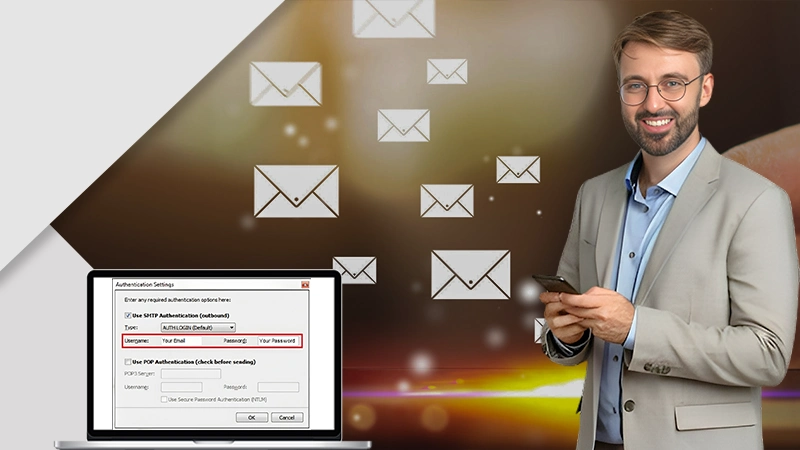
- On the following screen, switch to the IMAP tab and fill in the following email server settings:
- Incoming Mail Server:
- Host Name: imap.ionos.com
- Username: Your full IONOS email address
- Password: Your email account password
- Outgoing Mail Server:
- Host Name: smtp.ionos.com
- Username: Your full IONOS email address
- Password: Your email account’s password.
- After you have filled in all the information, tap on Next.
- Finally, select the apps you want to sync with your email account. Don’t forget to turn on Mail, and then, tap on Save.
With this, your IONOS Webmail account is set up, and you can now use it to send and receive emails on your iPhone.
Android:
However, if instead of an iOS device, you own an Android, you will need to follow the below steps to do a one & one email setup.
- Open the Settings app on your device.
- Scroll down on the Settings page, and tap on the Accounts section.
- Then, select the Add Account option.
- On the following page, tap on the Personal (IMAP) option.
- Fill in your IONOS email address on the next screen, and tap on Next.
- Enter the password of your IONOS email account and again, tap on Next.
- So to do one & one email setup, you have to further fill in your Incoming Server Settings, which are as follows, and then tap Next:
- Username: Your email address of 1&1 webmail service
- Password: Your email account password.
- Server: imap.ionos.com
- In the next screen, you will be asked to enter your Outgoing Server Settings. They are given below; fill them out and tap Next:
- Username: Your IONOS email address
- Password: Your email account password.
- Server: smtp.ionos.com
- Select your Account Options, and then tap Next.
- Finally, provide your email address and name, and tap Next.
Once you tap on the I Agree button when Google’s Terms of Use page appears, you will be ready to use your 1and1 email webmail account on your Android device.
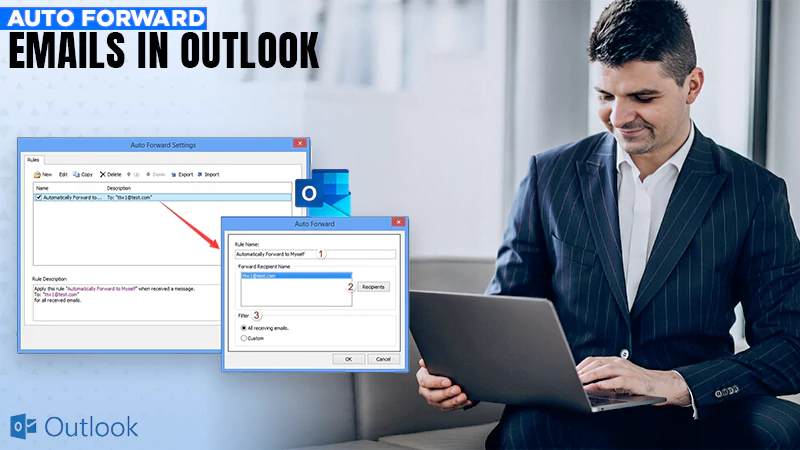
Outlook:
If instead of an iOS or Android device, you want to set up your 1&1 webmailer service on Outlook, you must use the steps mentioned below to do that.
- Open the MS Outlook app on your device and click on the File menu option in the top left corner of the screen.
- Under the Info tab, click on the Add Account button.
- Then, the Add Account window will open. There, you have to enter the info given below and then, click Next:
- Your Name: Enter your name which will be displayed on all outgoing emails.
- Email Address: Your email address of 1&1 webmailer service
- Password: Your IONOS email account password. Fill it again in the Retype Password field.
- If prompted, check the box and click Allow to allow the setup configuration to be automatically applied.
- Allow Outlook some time to apply the configuration and verify the email settings. When it’s done, click Finish.
You can now use your IONOS email account in Outlook, and utilize some of the best features like downloading all emails from webmail.
Note: Mail Business accounts in Outlook can only be used for email. You will need to log in to IONOS Webmail to access your address book, calendar, tasks, and drives.After entering your 1and1 email webmail account and password, Outlook should immediately discover your email settings.If you run into any issues with the automated setup, you may Manually Set Up an Email Account in Microsoft Outlook.
How to Reset IONOS Webmail Forgotten Password?
The steps listed below can be used to reset your IONOS Mail Basic as well as Mail Business email addresses.
Note: A forgotten/lost password may only be reset via the IONOS account and only when requested by the account holder, for data protection reasons. The current password cannot be sent, displayed, or communicated, so you only have the option to reset your forgotten password.
- First off, open the browser and go to the login page of Ionos with this link – https://login.ionos.com/.
- There, fill in your email address and click Next. Then, enter your IONOS account password and log into your account.
- Then, click on the Email option.
- After this, you will be displayed a table where all the email addresses you have created with the 1and1 email webmail service will be listed. From the table, select the email account for which you want to change the password.
- Next, click on the Gear icon present next to the desired email address.
- Thereafter, a menu will open, where you have to click on the Change Password option.

- Finally, fill in the new password, and click on the Change Password button.
Once you have followed the above process to change your password, it will take a few minutes to reflect the changes, and then you can use it to do the webmail IONOS login.
Note: If you use an email client on your computer, such as Microsoft Outlook, or if you check your emails on a mobile device, you must also change the password saved in that program’s/device’s account settings in order to continue using your email without any difficulty.
However, if you have forgotten your password, and want to change your Webmail IONOS 1&1 password, then the steps to take so are different from the ones given above.
And, here are these:
- To begin with, you will need to open the password center – https://password.ionos.com/.
- Enter your customer ID for the Ionos account or the name of a domain registered at this service.
- Select Next. So to initiate the password reset, you will receive an email on your linked email address.
- In that email message, click on the link to Create a New Password. Further, follow the instructions that you will receive in your email for setting up a new password.
Hence, if you’ve forgotten your password, you can easily reset it with the help of the instructions that you receive in your linked email account.
Note: The email link for a password reset will only be valid for 4 hours only. In case you did not receive it, make sure to check your Spam folder.
Conclusion
Therefore, to register for the Ionos webmail service, you may easily select the email plan, and make the payment. To log in, you will just need the email address and password of your account.

Due to its structure of top-performing webmail systems, it is simple and easy to set up the 1&1 webmail service on iOS, Android, and Outlook. However, if you want to do a password reset, you can do it from the settings page of your account.
FAQs
Ans: For the Ionos webmail, the email limit is 100 MB, while the file size limit is 72 MB.
Ans: To export all your emails from Ionos webmail just follow these steps: Select an email >> Press Ctrl+A >> Select Other actions >> Click on Save.
Ans: The 1&1 webmail can be operated by both the POP or IMAP.
Ans: The Ionos email archiving can be done easily via this link – https://www.ionos.co.uk/office-solutions/email-archiving.
Sources
Read More: