Midco Webmail – Login & Email Account Settings
Midco Webmail is a very easy-to-use email service that gives you the tools to manage your personal or business email account. With Midco Webmail, you can log in at any time and check your email, as well as organize how you want to see your emails. You can also manage multiple email accounts with just your Midco email address – you get up to 10 – to create, send and manage your messages for free.
You have the option to create multiple accounts with Midco. This is a good option if you want to separate your work, personal, and kids’ emails into different accounts.
Midco Webmail Login
Midco Webmail Login is a secure and straightforward way to access your email account. This page enables you to log in to your mail at mail.midco.net via a web browser; you can use this page as an alternative to your email client. This login is provided for your convenience only. It is not required, and we recommend that you always use your email client instead of this login.

To access your Midco Webmail Email Account, you will need to follow these simple steps
1. Open your browser and go to this Midco Webmail Login page (https://mail.midco.net/).
2. Enter your email address (jdoe@sio.midco.net or jdoe@sio.midco.net ) and password in the required fields.
3. Click on the Sign In button to login into your webmail account.
Midco Webmail Password Reset
There are a few ways you can change the password on your Midco account. If you have access to your Midco Internet Service email account, you can change it on My Account or in the My Account app. You can also change your password by calling Midco.
Reset Email Password in My Account
You can edit your password for all your email accounts in My Account.
- Log in to My Account.
- In the Services section next to the Internet, select Manage Email.
- Select the email address you want to modify.
- Click Change Password.
- Enter a new password twice.
- Click Save. A message will display when your password has been successfully saved.
Reset Email Password in App
You can edit the passwords for all your email accounts in the My Account app on your smartphone.
- Log in to the My Account app (available in the App Store and Google Play).1
- Tap the Account icon.
- Select Edit next to the email address you want to update.
- Next to the password field, tap Edit.
- Enter a new password twice to confirm it.
- Tap Done for Apple devices or the checkmark for Android devices.
Reset Midco Webmail Account PIN
Midco customers can Reset the Midco Webmail Account PIN on your Midco website. Please know that your Midco webmail account PIN is used to verify your identity when you call in to make account changes or be connected to our support team. If you forget your PIN, you will be asked to answer two security questions.
To Reset Midco Webmail Account PIN, follow these steps:
- Log in to My Account.
- Select the Settings tab or, under Popular Topics, choose to Manage My Account Settings.
- Select Edit and enter or change your 4-digit numerical PIN in the Profile section.
- Letters and special characters such as, ! @ and ? are not allowed.
- Click Save.
Register for Midco My Account
Midco My Account Registration is the place to manage your Midco services, view and pay your bill, and get updates on your Midco services. Midco My Account Registration also allows you to register for Midco Email Alerts, which will send you to account updates, service status updates, and payments reminders.
Midco TV Everywhere is a service that allows Midco customers to access digital content from anywhere using their Midco My Account email address and password. To access digital content from your TV provider using your Midco My Account email address and password, you must register that address with your TV provider.
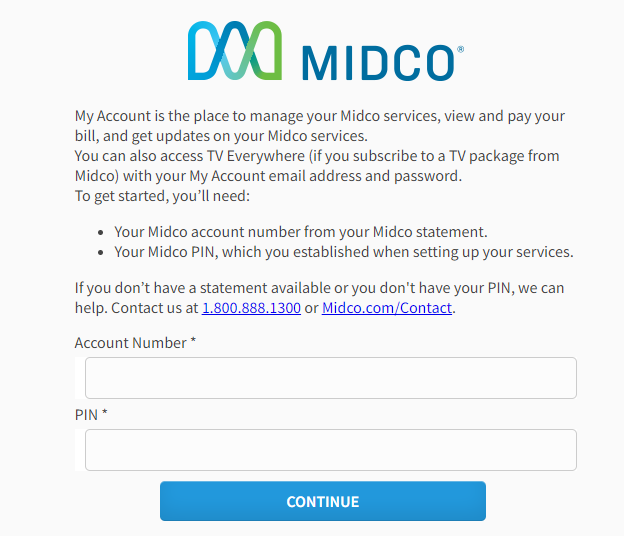 To create an account, you will need:
Your Midco account number
Your Midco account number from your Midco statement is found on your statement. You will find it on the back of your statement in the upper right corner.
Your Midco PIN
Your Midco PIN is your personal identification number. It is a combination of letters and numbers used to identify you as an account holder. Your Midco PIN is the same as the PIN that you use to access your account.
Steps to create a My Account:
1. Visit Midco.com/MyAccount.
2. Click Create Account.
3. Enter your account number and PIN.
4. Enter and confirm your email address.
-
- Your email address is the key to your identity. Make sure it’s one that you use frequently.
5. Enter and confirm a secure password.
-
- The password is a combination of letters, numbers, and special characters. For the password to be secure, you need to be sure to make it strong.
6. Enter your cell phone number.
-
- If you have trouble logging in, we recommend adding a second factor to your account using our new and improved security system.
7. Select your notification preferences.
-
- To set up Midco, you must choose between receiving emails about our service and texts for messages sent to you.
8. Read and accept Midco’s terms and conditions.
9. Click Register.
10. You’ll receive a confirmation email.
11. If you’re entering a phone number, you’ll receive a confirmation text from 83069. No need to reply to the text; simply ignore it.
Create Email in My Account
You can create an email address in My Account by following these steps :
- In My Account, select Services > Manage email.
- Click on Add Email.
- Enter an Email ID, Display your Name and Password.
- Select Save.
- A message will display when your email address has been successfully added.
Create Email Account in App
Midco customers may create an email account to write and send messages to other Midco customers. These accounts are called MidcoMail accounts. MidcoMail accounts are email accounts with a unique @midco.net mail address.
Your MidcoMail account is unique to Midco. Unlike most email accounts, your MidcoMail account won’t be used for sending and receiving emails from non-Midco customers. You can add a MidcoMail account to your My Account app to manage your MidcoMail messages.
- Log in to the My Account app.
- Tap Account. You’ll see a list of any email accounts you’ve already created.
- Tap Add an Email Account to create a new email account.
- Enter an Email ID, and then tap Check Availability to see if that email ID name is available.
- Enter a Display Name and Password, and then tap Submit.
Link Multiple Accounts in My Account
You can link multiple accounts to your own My Account to keep track of everything that happens with those accounts from a single place.
You can link accounts through the My Account portal if you are the Account Owner.
- Log in to My Account.
- Click Settings and locate Account Details.
- Click Manage.
- Go to Add Another Midco Account to My Profile.
- Enter the account number and the PIN for the account you want to add.
- Click Add Account.
Deactivate Midco Email Account
If you decide that you no longer need a Midco email address, you can permanently remove it from your account.
To delete the Midco email account, please follow these steps:
- Log in to My Account.
- In the Services section next to the Internet, select Manage Email.
- Select the email account you want to delete.
- Choose Delete.
- When the confirmation window appears, select Delete.
Midco Webmail Setup
To set up a Midco webmail email account on third-party email clients, you will need email server settings details to configure the email clients.
Midco Webmail Email Server Settings
Here are the email servers settings –
- Incoming server: pop.midco.net
- Server port
- If POP server, server port number = 995
- If IMAP server, server port number = 993
- Outgoing server: smtp.midco.net
- Port: Port 25, Port 465, or Port 587
- Requires a secure connection (SSL) or TLS: checked
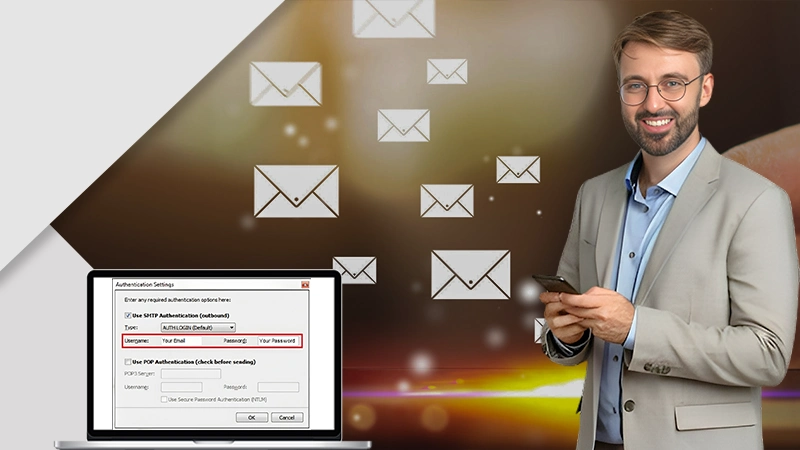
- Outgoing server settings: Your full username/email address and password
- Outgoing server requires authentication: Yes.
- Secure password authentication (SPA): No
- User name: your full email address
- Password: password for your email address
Midco Webmail Setup in Android
To set up your email on your Android device, follow these steps:
- Open Apps.
- Tap Email.
- Enter your full email address and password.
- Select Next and then POP3.
- Enter the following:
-
- Username: full email address
- Password: email address password
- Server: pop.midco.net
- Port: 995
- Security type: SSL/TLS
- Delete Email From Server: when I delete from Inbox.
- Authentication Type (if presented): Auto
6. Tap Next, and enter the following:
-
- SMTP server: smtp.midco.net
- Port: 465
- Security Type: STARTTLS
- Require Sign-in: checked.
- Username: full email address
- Password: email address password
7. Tap Next.
8. Under Inbox Checking Frequency, select options for preferences on new email.
9. Tap Next.
10. Enter an account name and outgoing name displayed on emails sent.
11. Tap Finish.
Midco Webmail Setup in iPhone and iPad
Today, many mail clients can auto-detect the email server/s settings and make it easier for you to set up your email on your device; however, if all automated procedures are exhausted (e.g., because they don’t work!), you can always manually set up your email by performing the steps below.
Midco Webmail Auto Setup
To use auto-setup to add your Midco email on your iOS device:
- Open your browser and go to ios.midco.net.
- On the setup page, enter your full email address (not just the username portion but your complete email address), your first and last name as you wish to appear on outgoing emails, along your full-fledged email password.
- Tap Request Configuration.
- When prompted about the download of a configuration, tap Allow.
- From the home screen, tap Settings.
- Select General, and then Profile.
- Tap the Midco.net mail profile listed, and then Install.
- On the Install Profile screen, select Install.
- On the Profile Installed screen, tap Done.
Midco Webmail Manual Setup
If the auto setup doesn’t work, manually set up your Midco email on your iOS device using these steps:
- Open your iOS device and tap on Settings.
- Then tap on mail.
- Under Accounts, choose Add Account, and then Other.
- Tap Add Mail Account.
- Enter your name on the New Account screen as you want it to appear on outgoing emails, your full email address, and your email password.
- Tap Next, and then select POP.
- For incoming server settings, enter the following:
-
- Host name: pop.midco.net
- Username: full email address
- Password: email address password
- For outgoing server settings, enter the following:
-
- Host Name: smtp.midco.net
- Username: full email address
- Password: email address password
- Tap Save.
- From the Accounts screen, tap the email account you added.
- Then select Advanced.
- On the Advanced screen, confirm or enter the following:
- Under Deleted Messages:
- Remove: After one week.
- Delete from Server:
- When Removed From Inbox
If you want to return to the home screen, press the Home button if you have an older phone.
Midco Webmail Setup in NOOK Tablet
To set up your Midco email on your NOOK Tablet, follow these simple steps:
- Open Apps
- Then tap on email to access the NOOK email app.
-
- If you are not already using an email account on your NOOK yet, you will see the screen prompt to create a new account.
- Tap the Email Accounts Menu
- Select Accounts.
- Tap on Add Account.
- Enter your email address and password on the email account setup screen.
- Check the box next to Send email from this account if you want to make it the default account for sending mail from your NOOK.
- Tap Next.
- Your NOOK will try to set up your email account. If the setup doesn’t work, tap Manual setup.
- Choose POP for the account type.
- Enter these incoming server settings:
-
- Email address: full email address
- Password: email address password
- POP3 server: pop.midco.net
- Security type: SSL or TLS
- Port: 995
- Delete email from server: never.
10. Tap Next.
11. Enter these outgoing server settings:
-
- SMTP server: smtp.midco.net
- Security type: TLS
- Port: 25
- Require sign-in: checked.
- Email address: full email address
- Password: email address password
12. Tap Next.
13. Set to check email every 5 minutes, and select Next.
14. You need to give your account a name to complete the setup.
-
- Email account: Midco.net
- Email account name: your first and last name
15. Tap Done.
Midco Webmail Setup in Mac Mail
To set up your email in your Mac Mail application, please follow the below steps:
- Open the Mail app.
- Enter your full name, email address, and password on the Welcome to Mail screen.
- Click on Continue.
- Enter these incoming server settings:
-
- Account type: POP
- Description: (optional) what you want to name your account
- Incoming mail server: pop.midco.net
- Username: full email address
- Password: email password
4. Select Continue.
5. Enter these outgoing server settings:
-
- Description: (optional) what you want to name your account
- Outgoing mail server: smtp.midco.net
- Use only this server: checked.
- Use authentication: checked.
- Username: full email address
- Password: should auto-populate with the password.
6. Click Continue.
7. Make sure to check the Take Account Online on the Account Summary screen. If you want to, click create.
You’ve now set up your email on your computer. To access your email, open the Mac Mail app.
Midco Webmail Setup in Mozilla Thunderbird
Mozilla Thunderbird is a free program that allows you to send and receive emails on your computer, phone, tablet, and other devices. It can be set to determine the correct server settings for your email automatically.
To set up your email in Mozilla Thunderbird, please follow these steps:
- Open Mozilla Thunderbird.
- Select Tools.
- Select Account Settings.
- Click Set up an account, and then email.
- Enter your name, email address, and your email password.
- Select Continue.
-
- Thunderbird will attempt to configure your email server settings automatically. If it’s successful, it will show your server settings in the current window. Make sure the Create Account option is selected and click on OK.
- If auto set up doesn’t work, make sure POP3 is selected and choose manual setup.
7. On the Mail Account Setup window, enter the following:
-
- Incoming: POP3
- Incoming server hostname: pop.midco.net
- Incoming port: 995
- Incoming SSL: SSL/TLS
- Incoming authentication: regular password
- Outgoing: SMTP
- Outgoing server hostname: smtp.midco.net
- Outgoing port: 587
- Outgoing SSL: STARTTLS
- Outgoing authentication: regular password
- Username: full email address
8. Select Done.
Your email is up and running. You can access your email by clicking on the inbox option on the left menu. If you want to return to your desktop, close the application or minimize it.
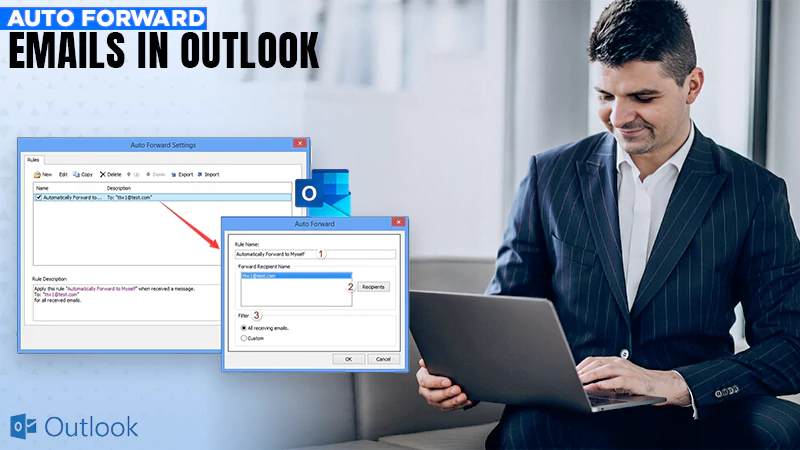
Midco Webmail Setup in Outlook
To set up your email in Outlook, follow these steps:
- Open Outlook.
- Select the File
- Select Account Settings.
- On the Email tab, choose New.
- Select Manual setup or additional server types.
- Then click Next.
- Select POP or IMAP.
- Then select Next.
- Enter your full name and email address.
- Under Server Information, enter the following:
-
- Account type: POP3
- Incoming mail server: pop.midco.net
- Outgoing mail server: smtp.midco.net
- User name: full email address
- Password: email address password
- Remember password: checked
- Require logon using secure password authentication (SPA): leave unchecked
11. Select Test Account Settings to check your settings.
12. Then click Next.
13. Click Finish and then Close.
Your email is working on your computer. Go to your desktop by minimizing or closing the application. You can open the Outlook app to see your email.
Midco Webmail Setup in Outlook
To set up your email in Windows 10, follow these steps:
- Select the Windows Start and choose mail.
- Select the Settings gear icon.
- Choose Manage Accounts.
- Select Add account.
- Select Advanced Setup, and then Internet email.
- Enter the following:
-
- Account name: what you want to name your account
- Your name: name that should appear on outgoing emails
- Incoming mail server: pop.midco.net
- Account type: POP3
- User name: full email address
- Password: email address password
- Outgoing (SMTP) email server: smtp.midco.net
- Outgoing server requires authentication: checked
- Use the same user name and password for sending an email: checked
- Require SSL for incoming mail: checked
- Require SSL for outgoing email: checked
7. Select Sign In, and then Done.
You have your email set up on your computer. If you want to go to your desktop, minimize or close out the application. The Mail app allows you to access your email at any time of the day.
Midco Webmail Customer Support
Midco CMS Webmail Service is designed for Midco customers to view their email accounts. If you face any issues with Midco Webmail, you can contact Midco Customer Service to get help and assistance from their trained technicians.
Midco Webmail Customer Support Services is an effective and reliable way to contact Midco. You can call on 1800-888-1300 and chat support at midco.com.
Read More: