Xplornet Webmail – Login & Password Reset Steps
Xplornet provides an easy and secure way to manage your Xplornet webmail and MyXplornet account in one central location, 24 hours a day, and seven days a week.
Xplornet Webmail provides a separate webmail service for General and Domain-based custom email addresses.
The general email address for Xplornet webmail ends with: @xplornet.ca, @xplornet.com, or other Xlornet domain extensions, and the Custom email address ends with a custom domain name (e.g., anyname@anyname.com).
So, let’s see how you can log into these webmail accounts.
Xplornet Webmail Login
To access the General email address based on Xplornet webmail, follow these easy steps –
1- Open your browser and go to this link (https://mail.xplornet.com).
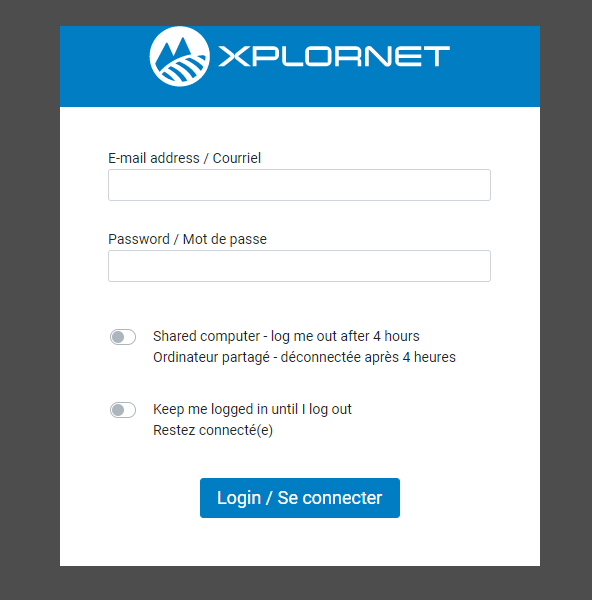
2- Enter your Xplornet email address (e.g., yourname@xplornet.ca, yourname@xplornet.com) and Password.
3- Then, check Shared computer (It will log you out after 4 hours).
4- Then, check the Keep me logged in until I log out (It will not log out until you log out).
5 – Click on Login to access your webmail account.
To access the Xplornet webmail account based on a customized domain-based email address, follow these easy steps –
1- Open your browser and go to this link (https://email.xplornet.com/#/login).
2- Enter your email address (e.g., anyname@anyname.com) and Password.
3- Click on Login to access your webmail account.
Xplornet Webmail Password Reset
To reset your Xplornet webmail password, follow these easy steps –
- Click Settings.
- From the Settings pane, select Password.
- Select Change Password.
- In the Current password text box, type your current email password.
- In the New password field, type your new email password.
- Re-type your new email password in the Confirm password.
- Click the Save button.
Note: When assigning a password to the customer please do not use the same password each time, use a set of random letters and numbers; Use complex passwords that are hard to guess.
Setup Password Recovery
Option 1 – External Email
- Click Settings
- Click Password Recovery
- Click Email
- Add an external email address, type your existing password.
- Click Save
- Enter the emailed token number into the response token field
- Click Save
Option 2 – Challenge
- Click Settings
- Click Password Recovery
- Click Challenge
- Enter the Challenge question & non-case sensitive Response
- Enter your existing password
- Click Save
Repeat as desired.
How do I recover my password?
When you enter the wrong password, you are prompted with an error.
- Click “Reset your password”.
- Select the recovery option you would like to use.
Option 1: Email
You will receive an email with a recovery token at the alternate email you have set up in webmail.
- Enter the token you received in your alternate email.
- Enter and confirm a new password.
- Click Submit. This will give you an information screen confirming your password has been reset.
- Return to the Login screen and attempt to log in with your new password.
Option 2: Challenge
One of the Challenges you have set up will be selected at random.
- Enter the Challenge-Response you have set up (it is not case sensitive).
- Enter a new password and confirm it.
- Click submit. This will give you an information screen confirming your password has been reset.
- Return to the Login screen and attempt to log in with your new password.
Xlornet Webmail Basic Features Guide
Learn how to compose emails, create folders, manage your address book, and more.
How do I compose a new email?
Click the Compose mail icon in the toolbar.
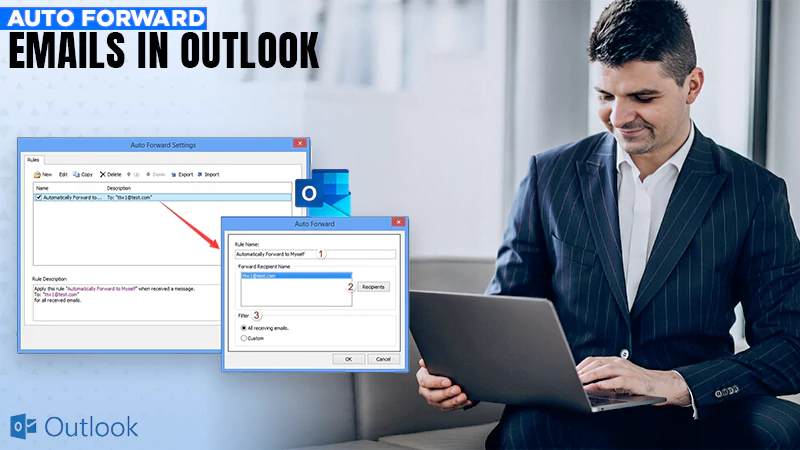
How do I forward the email from my webmail to another address?
- Click Settings.
- From the Settings pane, select Mail Forwarding.
- Check the Enabled box.
- To leave a copy of the forwarded message in the webmail account, leave the Keep local copy box checked.
- In the Forwarding text box, enter the address to which you want to forward your messages.
Note: Separate multiple addresses with a comma.
- Click the Save button.
Note:
You should now see a message confirming the forwarding change.
How do I customize my spam settings?
- Click Settings.
- Click Spam Settings.
- Type in allowed and/or blocked senders.
-
- You can also type an asterisk (*) and include the domain name of an email to allow or block messages from that domain. (Example: *randomdomain.com)
- The safe sender’s list overrules the blocked sender list. If you bypass the Spam filter by adding the asterisk to the safe sender’s list, any email addresses or domains added to the blocked sender’s list will continue to go to the Inbox.
- Click Save.
Read:
FibreOP Webmail – Bell Aliant Email Login & Settings
InsightBB Webmail – Login to Insightbb.com Webmail
MIS Webmail – Login & Email Settings (Managed Internet Service)