Redshift Webmail – Redshift.net Webmail Quick Login
Redshift company is a provider of secured home and business networks, modern home automation systems, also computer Optimization and repairing services. As well as you can get help regarding high-performance computing Kubernetes and more from the experienced engineers of the company. This company is situated in Monterey, California. Redshift provides an email service as Redshift Webmail for communication in the form of messaging. In this article, we are mainly focusing on the Webmail service of this company.
Redshift Webmail Login
- To access the Webmail Redshift, you can simply go to the website of the redshift company at redshift.com And click the menu button on the top right corner.
- Then you will see an option called Webmail click on it.
- Now it will give you three options for the Webmail account. you can select one as your preference.
First option Redshift.com Webmail
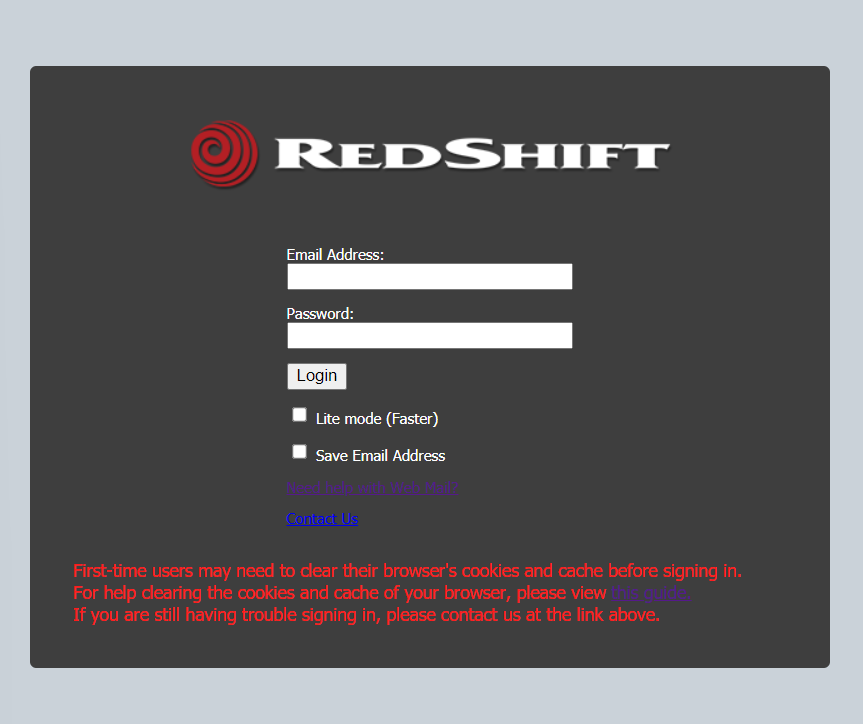
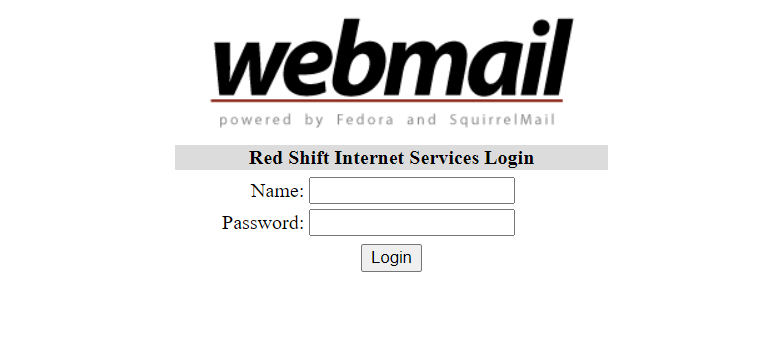
After clicking this option, you will be directed to a login prompt and also you can directly go to this webpage by the URL https://webmail.redshift.com.
Second option redshift.net Webmail
You will be directed to another login prompt by clicking this option also you can visit this login prompt by entering the URL http://webmail.redshift.net.
Third option Montereybay.com Webmail
 This is also the same as the above options then you can receive this login prompt directly by entering the URL https://webmail.montereybay.com.
Using Redshift Webmail
Sending Emails
- First, go to the RedShift webmail login page and log in to your account.
- Then click the “New” button or the “New Email” button under the shortcuts.
- You will receive a pop-up window to compose your message and type the receiver’s email address. You have other ways to do that.
- Using SimpleClickTM
- Selecting contacts in your account
- If you want to send a carbon copy (cc) or blind carbon copy (bcc) of the message, you can enter email addresses to these fields by using one aforementioned method.
- You can use the “Check Spelling” option to check the spelling mistakes.
- If you want to save the email as a draft before sending it, simply click the “Save” button. Also, you can use the “Save Outgoing Message” option to save it in the “Sent Mails”.
- If all is set, send the message by clicking the “Send” button.
Name and the Signature
- Name – Set the name as you want to appear in emails you send.
- Signature – Set a signature to automatically add to the end of the messages you send. Also, you can make this disabled.
Adding Attachments
- Compose your message by going through the above steps under “Sending Emails”.
- Click on “Attach” and then select where your file is located. Maybe on My Computer, an Online File, or another.
- Select all the files and click the “Open” button. Even after that, you can add more attachments by the same method. You will see the attached files in the composing window now.
- You can simply use the “Remove” option to remove attachments you have added.
Checking Received Attachments
- If a received message contains an attachment, it will be indicated with a paperclip icon.
- Open that message and you can see the attachment name inside it.
- To preview, you can click the “Open” button.
- To download, you can click on the “Save” button and then select the path where you need to save the attachment.
Enable New Email Alerts
- Go to “Preferences”.
- Find “General Settings” under the Email Settings and click.
- You will see the “New message notifications” title and select your preferred “Notify me: ” option and time.
- Now click on the “Save” button.
Read:
TCSN Webmail – Login & Password Reset
Latech Webmail – Login, POP3 Email Settings
PTD Webmail – Login, Settings & IMAP Setup
Aristotle Webmail – Login With Thunderbird
Read more at – https://webmailup.com