How to Download All Emails from Gmail?
Want to know how to download emails from Gmail? Let’s start with a necessary introduction…
Keeping a downloaded copy of all your emails on your device is a wise choice. As you never know, when a technical glitch happens, and your email application (which will be Gmail in this article) decides to wipe off all your emails in a whoosh. It’s very frightening even to imagine the scenario, as there’s a lot of important information in your emails.
Well, you can be unaffected by this crisis if you have downloaded all your emails from Gmail on your device. But how can you do that? Or is it even possible? Many questions like this must pass through your mind. Let me tell you, it is very possible in Gmail; in fact, the process to do so is as simple as forwarding webmail emails to Gmail. You just have to follow the given steps, and all your Gmail emails will be downloaded.
Jotted down in this write-up is the process that will let you know how to download Gmail emails in bulk. Further, you will also get to know how to export emails from Gmail in a single thread and how to download a single email.
Now, without delay, let’s see how you can do all that…
Downloading All Emails from Gmail using Google Takeout
Want to know how to download all emails from Gmail? Well, by using Google Takeout, you can easily download or export Gmail emails in bulk.
Google Takeout is a Google Data Liberation Front initiative that allows you to export data from Google services into a downloadable archive file. It’s an excellent solution for Gmail users to save and download data. Further, it is very easy to download data using Takeout.
So, if you are ready to know how to export emails from Gmail in bulk, follow the steps given below (these instructions will work on both a PC and a Mac):
-
- First off, open the Gmail account on your browser.
- Once you are in your Gmail account from which you want to download the emails, click on the profile icon and select the Manage Your Google Account option.

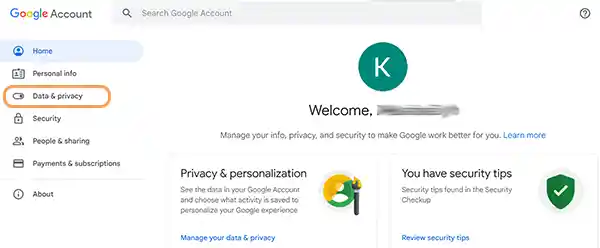
- Next, click on the Data & Privacy option present in the left sidebar of the window that will open.
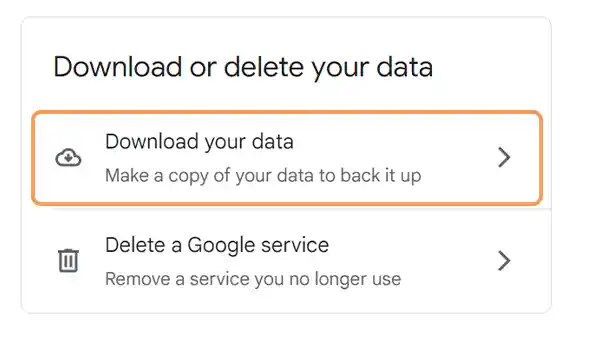
- After that, you have to go to the Data From Apps And Services You Use section and click on the Download Your Data option.
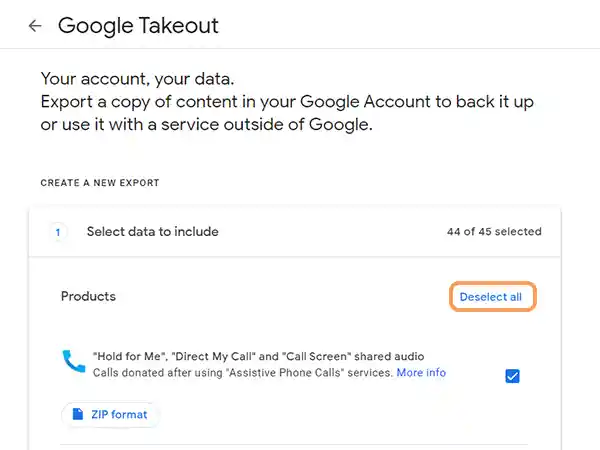
- For downloading all Gmail emails and not any other data, click on the Deselect All option on the following screen.
- Now, scroll down on the page, find the Mail option, and select the checkbox next to it.
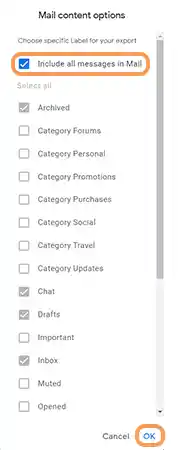
- Thereafter, click on the All Mail Data Included option.

- By selecting this option, you will be able to download all emails from Gmail and also emails from select Labels. In order to download all the emails from your Gmail, select the Include All Messages in Mail option, and click OK.
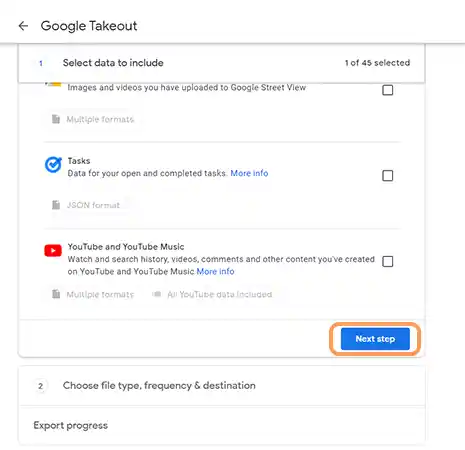
- Next, scroll down till you reach the bottom of the page, and click on the Next Step button.
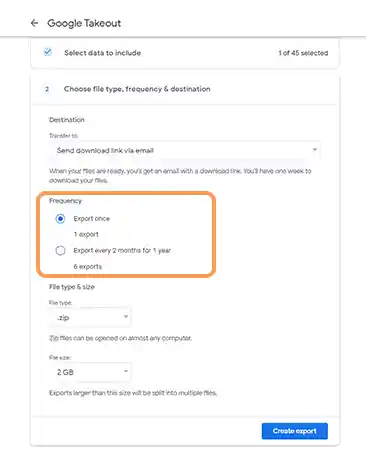
- On the next page, select one of the options in the Frequency section:
- Export Once: Choose this option for only 1-time export.
- Export Every 2 Months for 1 Year: Select this option if you want to automatically export your data every 2 months for a year.
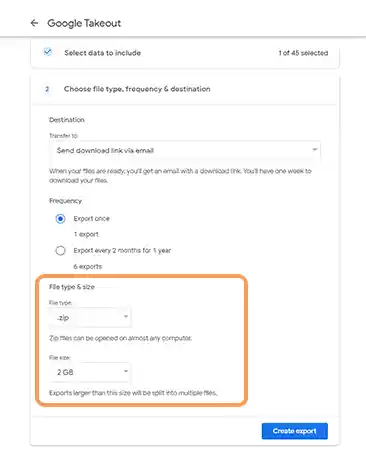
- Then, select the File Type. It can be either .zip or .tgz. And, also choose the size of the file.
- Further, you will have to select a Destination ‘Transfer To’ option to complete the downloading process. There are the following options you can select to download or export Gmail emails:
- Send Download Link Via Email
- Add to Google Drive
- Add to Dropbox
- Add to Microsoft OneDrive
- Add to Box
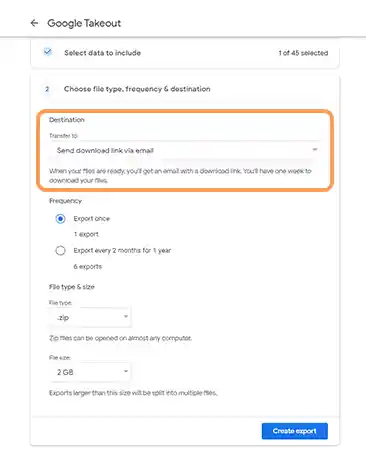
- Then, click on the Create Export button.
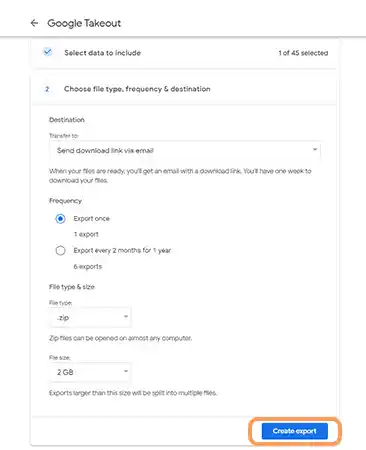
The steps after selecting each Destination option are a little different. However, you need not worry, as the steps for the three most popular options are mentioned below:
1. Send Download Link Via Email (Recommended)
After you have followed the above steps and selected the Send Download Link Via Email option, listed below are the steps that you need to follow further:
- Select the Create Export option.
- After that, you will get an email from Google having the link to download all emails from Gmail. In that email, click on the Download Archive button.
- Then, click on the Show Exports option present in the email archive section that you have requested.

- Finally, the Download Data window will open. Click on the Download button to start downloading your Gmail emails.
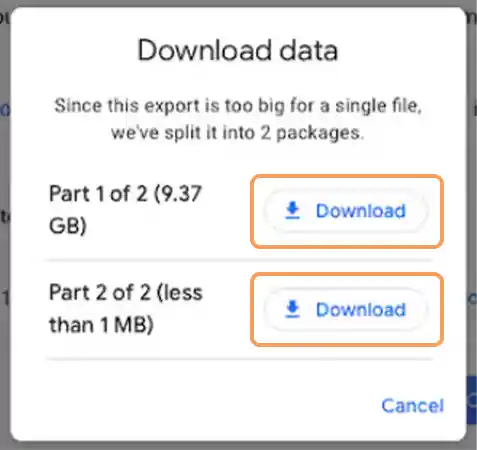
Note: It is advised to download the data as soon as the email for the same is received. After one week, the archived data will be deleted.
2. Add to Google Drive
In the Destination section, select the Add to Google Drive option, and then go through the process mentioned further:
- Select the Create Export option.
- Thereafter, you will receive an email from Google. There, click on the View In Drive option.
- This will direct you to a folder in your Google Drive where all your email data will be present in an organized manner. There, click on the Download option to export all emails from Gmail to your device.
3. Add to Dropbox
After selecting the Add to Dropbox option from the Transfer To drop-down menu of the Destination section, here are the steps that you need to follow further:
- Click on the Link Account and Create Export option.
- After this, you will be directed to the Dropbox page, where you have to sign into your Dropbox account.
- After you have signed in, you will see a prompt asking for permission to allow access to Google to download data within the Dropbox folder. Click on the Allow button in Dropbox.
- Next, you will get an email from Google. There, click on the View In Dropbox option.
- Finally, you will be directed to the Dropbox folder where all your Gmail emails will be present.
Note: To create an archive of all your emails and attachments, Google may take up to hours and even days, depending on the amount of data being requested to download or export. Further, it is only AFTER THE ARCHIVE IS CREATED WILL YOU RECEIVE THE EMAIL TO DOWNLOAD YOUR EMAIL DATA. So, be patient.
IMPORTANT: After you have downloaded the generated files of your Gmail data or saved them in the Drive or Dropbox, you will have to extract them. After extracting, you will get a file named archive_browser.html containing export process information and the Mail folder. In the Mail folder, you will find the MBOX file that contains all your downloaded Gmail emails.
Steps to Download Emails from Specific Labels in Gmail
If you want to know how to download emails from Gmail but only from some specific Labels, then this is the section for you.
Stated below are the steps that will let you download emails from Gmail for some specific Labels of your choice:
- First off, on your browser, open the Google Takeout page.
Note: Ensure that you are signed in using the Gmail account from which you want to export or download emails. Otherwise, click on the profile icon in the top right corner and select your required Gmail account.from which you want to export or download emails. Otherwise, click on the profile icon in the top right corner and select your required Gmail account.
- Now, click on the Deselect All option.
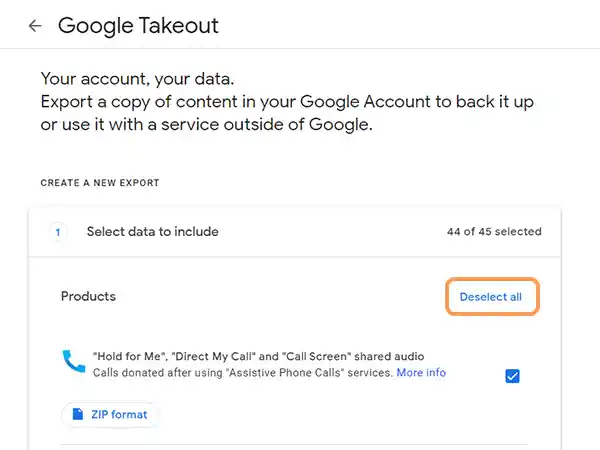
- After that, scroll down in the list, and find the Mail section. Click on the checkbox next to it.
- Then, click on the All Mail Data Included option.

- Now, a window containing the list of all your Gmail Labels will open. From there, select the Labels from which you want to download your emails and click on OK.
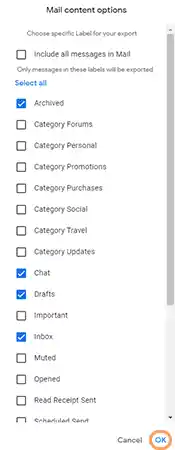
- Then, scroll to the end of the page, and click on the Next Step button.
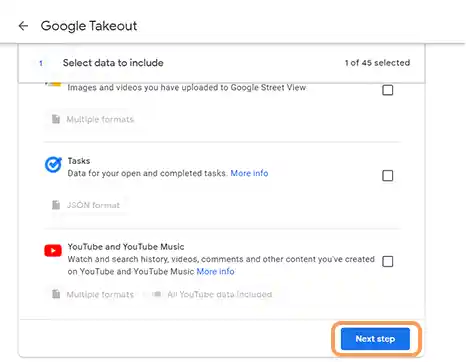
- After that, you will have to select the data download Destination, Frequency, and File Type & Size. From here, the steps that you need to follow to complete the Gmail email export and download are the same as those given above in the “Downloading All Emails from Gmail using Google Takeout” section of the article.
How to Download an Email Thread from Gmail?
In the above methods, we have seen how to download Gmail emails in bulk, but what if you want to download emails only from a single email thread?
Well, don’t you worry! That, too, is possible in Gmail. Stated below is the process that will let you know how to download all Gmail emails from a single thread:
- Begin by opening your browser and signing into the Gmail account from which you want to download the email thread.
- Now, scroll through your inbox and open the email thread that you want to download.
- After that email thread window opens, click on the more menu icon (three dots) present in the upper right corner.
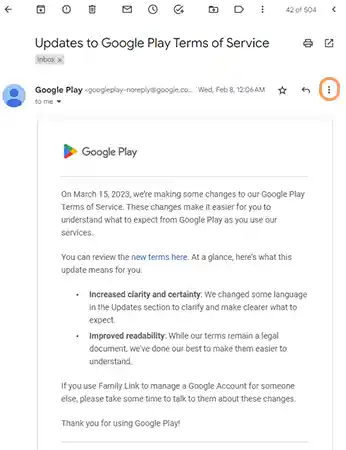
- Thereafter, a context menu will open, where you have to select the Download Message option.
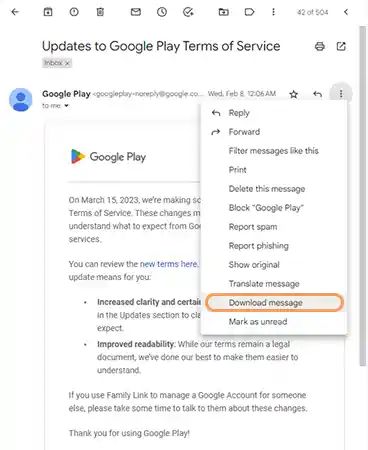
- As soon as you click on the option, the email thread will be downloaded to your device. You can find the same in your Download folder or the folder you have chosen to save all your downloads from the browser.
Download an Email from Gmail as a PDF File
When you download an email from Gmail, it is usually downloaded in an unconventional file format, and you have to use different software to open them. But, you will need to use another software to access the email data when you get to know how to export an email from Gmail in PDF format.
Yes, there’s a way you can download your email from Gmail in a PDF file format. Stated below are the instructions that show you exactly how to do that:
- To begin with, open the browser and sign into your Gmail account from where you want to export the email.
- Now, scroll through your inbox and find the email to be downloaded.
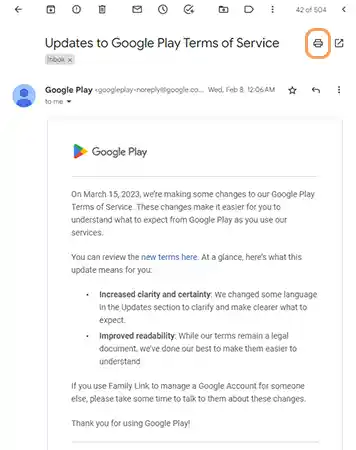
- Click on that email to open the email window. There, click on the printer icon present to the right of the email subject line.
- This will open the printing window on your screen. In that window, click on the Destination drop-down menu, and select the Save as PDF option.
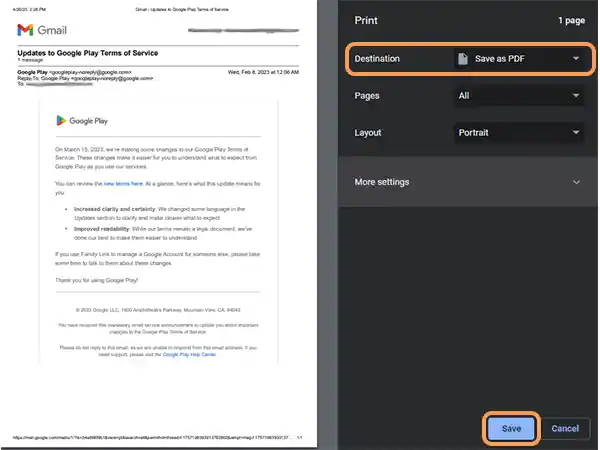
- Then, click on the Save button.
- Now, select the location on your device where you want to save the exported file and click on the Save button.
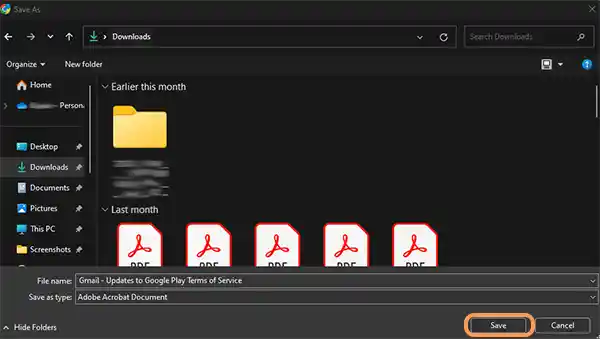
With this done, the email will be saved to the specified location on your device in PDF format.
And, with that said, the write-up ends here. I hope you now know how you can download single or multiple emails from your Gmail account.
Read More:
- How To Transfer Contacts From Webmail To Gmail?
- Quick Methods To Recall An Email In Gmail Application On Android, IOS And PC
- How To Add Webmail To Gmail?
Sources:
