Quick Methods to Recall an Email in Gmail Application on Android, iOS and PC
Almost all of us have sent incorrect emails to our seniors and colleagues that we regret sending later. In fact, this morning, I sent an erroneous email to my senior, which was really embarrassing. Imagine how upsetting it can be when you are working as a content writer and you send a wrong email full of errors to your senior.
The entire situation made me feel that I needed to find a solid solution to this. And, here I am writing this blog to make you aware of how to recall a message in Gmail. So, if you are wondering how you can recall an email in Gmail, read the article till the end to get tried and tested solutions to this problem.
Reasons to Recall Gmail Emails
If you don’t want to end up being embarrassed by sending a grammatically incorrect email to your superiors and co-workers, recalling your email in Gmail before sending it is a must for you. Here are some important reasons to recall an email in Gmail before sending it:-
- It removes spelling mistakes and grammatical errors.
- Prevents you from getting embarrassed about sending an important and confidential email to the wrong person.
- Eliminates the chances of sending an incomplete or wrong email.
- Gives you a second chance to add significant information and attachments that you forgot to send earlier.
Repetitive incidents of sending wrong emails in work areas can affect your job and your image. So if you don’t want to leave a bad impression at the workplace, read the next section to understand how to recall Gmail messages.
How to Recall an Email in Gmail Before Sending?
Gmail doesn’t have any direct ‘Gmail recall email’ feature, but there are still two ways to recall an email in Gmail before sending it. Below, I will be briefing both methods of how to recall an email in Gmail: –
Method 1: Set the Email Cancellation Timeframe in Gmail
You are in luck if you have realized that there’s some error in the email just after sending it because you have time to recall the Gmail message. Every Gmail account has a default time set to allow the individual to undo send and recall the email.
|
But you won’t be lucky every time to recall or notice the error immediately after sending the email. So, it’s best to extend the email cancellation timeframe in Gmail. You can manually change the email cancellation time within your Gmail account via settings. Here’s how to recall an email in Gmail by setting the email cancellation time: –
Step 1: Open Gmail and move to ‘Settings’.
![]()
Step 2: Tap on the option that says ‘See All Settings.’
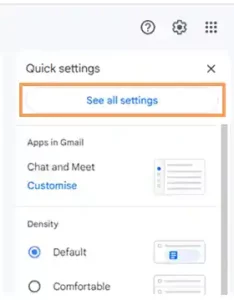
Step 3: Tap on the ‘Send Cancellation Period’ present next to the ‘Undo Send’ option.
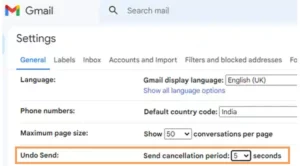
Step 4: Change the send cancellation period from 5 to ‘30 seconds’ for recalling email.

Step 5: Lastly, scroll down and tap on the ‘Save Changes’ icon present at the bottom of the screen.
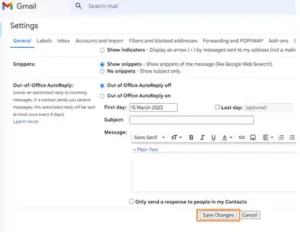
That’s it now the pop-up message of undo send that you receive at the bottom of the page after sending the email will remain for 30 seconds. It means that you will get 30 seconds of email recalling a time, and you can undo the send within 30 seconds in case there’s any error.
Method 2: Enable Confirm Before Sending Option
Did you know that you can recall an email in Gmail before sending it?
Here’s everything you need to know about how to recall messages in Gmail, even before sending them.
Enabling confirm before the sending option is the best way to recall and rectify email errors before sending. Carefully read and follow the instructions given below to enable confirmation before the sending option: –
Step 1: First, ‘Open Gmail’ and log into your account if you are logged out.
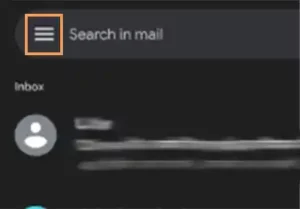
Step 2: Tap on the ‘Main Menu’ present on the top-left side of the screen.
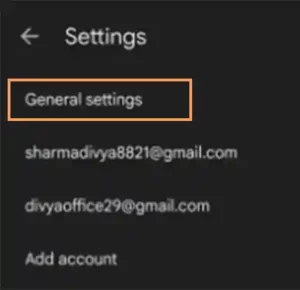
Step 3: Now, a new menu will open on your screen. Click on the option of ‘Settings’ from the shown menu.
![]()
Step 4: Select the option of ‘General Settings’ from the given menu.
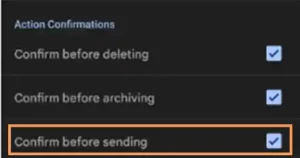
Step 5: Lastly, scroll down and tick ‘Confirm Before Sending Option’ under the ‘Action Confirmations’ option.
|
Moving further, let’s discuss how to recall a Gmail email after sending it.
How to Retrieve an Email in Gmail After Sending It?
If you are wondering how to recall an email in Gmail, you should know that Gmail allows you to do so through the ‘Undo and View Message’ option. You can access the option of ‘undo or view message’ both on mobile phones and the web version of Gmail.
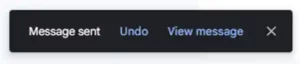
The ‘Undo or View Message’ notification will appear on the bottom of your screen just after sending the message.
Tap on the option of “Undo or View Message” to recall the Gmail. Both options will retrieve the sent email, thus allowing you to make the necessary changes.
That’s it now, the mail you have sent will be retrieved, and you can read and edit it to rectify the errors.
Now that you have understood how to recall an email in Gmail on Android and Desktop, let’s see the method of recalling sent emails in Gmail on various devices, starting with Apple.
Recall Sent Email Gmail on Apple Devices
The method of retrieving email in Gmail is similar for all Apple devices. Follow the following steps to know how to recall messages in Gmail: –
Step 1: Open your Gmail and log into your account.
Step 2: Tap on the icon of ‘Compose Email.’

Step 3: Now, ‘Enter the Recipients and Subject’ in the designated columns.
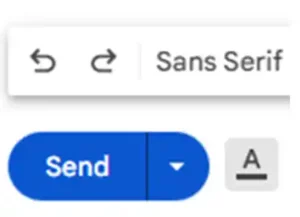
Step 4: Next, type the email body and click on the option of ‘Send.’
Step 5: A message of ‘Undo or View Message’ will pop up on your screen immediately after sending the email.
![]()
Step 6: That’s it, ‘Tap on Any of Them’ and your sent email will be retrieved.
So, that was all about how to recall an email in Gmail on Apple devices now, let’s understand how to recall email messages in Gmail on Desktop and Android devices.
How to Retract an Email in Gmail on a Desktop and Android Device?
Here’s how you can retrieve the sent email on desktop and Android devices: –
Step 1: Create an email and enter the subject body and recipient name.
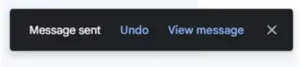
Step 2: Tap on the ‘Send’ option present at the bottom of the screen.
Step 3: A notification of ‘Undo and View Message’ will appear on your screen. Select any of them and the mail you send will be recalled instantly.
Furthermore, let’s discuss how the Gmail recall sent email system works to get a better understanding of how to recall sent emails in Gmail.
How Does “Gmail Recall Sent Email” Work?
The majority of people are concerned about whether the recipient will still be able to see the email after recalling it. In reality, the phrase ‘recall an email’ is quite misleading, as people think Gmail deletes the email from the inbox of the receiver. But that’s not how Gmail’s recall-sent email system works.
Gmail doesn’t send your email to the recipient until the completion of the ‘Undo Send Cancellation Period.’ So, if your undo sent time period is 30 seconds, the receiver will receive the email after 30 seconds of sending it. The 30 seconds of undo send cancellation are like a grace period that allows you to re-read and rectify the errors in your email.
| Note:
The only limitation of the undo send email feature in Gmail is the time limit. Undo send email gives you a maximum limit of 30 seconds to recall your sent email. But if you forgot to retrieve the sent email within the given time period, your email will be delivered to the recipients. |
Email Writing Tips to Eliminate the Chances of Writing Incorrect Emails
Writing an email is a professional skill; that’s why one needs to have a stronghold on email writing, especially if somebody belongs to the sales field. Creative approaching emails and free of errors emails can help you climb the ladder of success. Meanwhile, incorrect emails can create a negative impression of you at the workplace.
Knowing how to write emails without any grammatical errors is the icing on the cake. That’s why here are some essential email writing tips that can elevate your writing style and make your emails unique, appealing, and error-free. Here’s what to consider:
- Firstly, type your email in a Word document or Google Docs to prevent the chances of spelling errors and accidentally sending the email.
- Never write your emails in a hurry; sit properly, process your idea, write the email, and carefully read it at least thrice before sending.
- Create a habit of proofreading all the emails before you send them. It will help you rectify the existing errors and attach the important files in case you forget.
- Use some advanced tools and Chrome extensions that can identify and correct grammatical errors.
In case, you send an incorrect email to the receiver, rewrite the entire mail and apologize for human errors. Remember that human errors are natural and are acceptable if they happen once in a while.
Wrapping Up
The undo send is among the most useful Gmail features which is available for free. Knowledge of these features can ease your life and help you get the most out of your Gmail account. If sending incorrect emails is always an issue of embarrassment for you, the ‘Undo and View Message’ option could definitely be your savior. That’s it, you can subscribe to the website for more useful email-related content like this.
Also Read:
Sources