OST to PST Conversion: A Comprehensive Guide for Outlook Users
Microsoft Outlook is one of the most popular email service providers in the world.
It stores data in two different file formats, i.e. OST and the PST.
OST file can save a copy of the Outlook data in offline mode and sync data when it gets connected again.
Sometimes there is a need to switch clients or if you simply want to retrieve mailbox data from the inaccessible or orphaned OST file, you might want to make an OST to PST conversion first.
In this article, we’ll look into how we can convert OST to PST and also the tools and methods involved.
Use Stellar Converter for OST
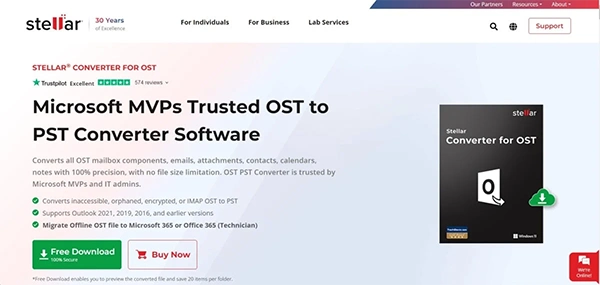
Stellar converter is one of the most popular tools to convert OST to PST files easily.
It is the preferred choice for its simple user interface that masks the complexity of the file conversion process and is easy to use for even novices.
- The first step is to download the Stellar Converter for OST from the official site.
- Run the installer and follow the instructions.
- Next, simply run the application and click on the Select Outlook Data File.
- Click on the Browse button, then navigate and select the specific .ost file for conversion.
- Click Convert and the file will be converted in a couple of minutes.
The Power Shell or the CMD
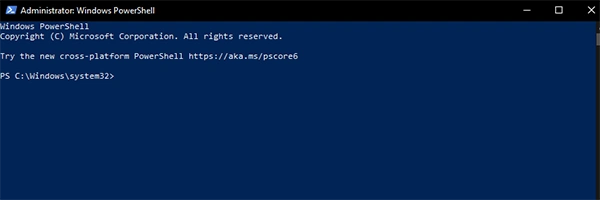
If you want to convert your OST files into PST without using Outlook or any third-party software, then try this method.
PowerShell is very limited in functionality and is not the preferred choice for many because it fails to deal with orphaned OST files very often.
- Right-click on the Start menu, navigate to the Windows Power Shell (Admin), and then run the application.
- PowerShell natively blocks scripts so run the following command to change the policy:
Set-ExecutionPolicy -ExecutionPolicyUnrestricted
When the prompt to confirm pops up, enter Y and then press Enter.
- Use the cd command to navigate to the OST file location.
- Then run the following command in the PowerShell to start the OST to PST conversion:
New-Object -ComObject Outlook.Application | %{$_.Session.AddStoreFromFile(“Path\to\YourOSTFile.ost”)$_.Session.GetDefaultFolder(6).Items |Select-Object -Property Subject, ReceivedTime, SenderEmailAddress |Export-Csv -Path “Path\to\Save\YourPSTFile.csv” -NoTypeInformation}
- Now wait for the conversion to complete. (Wait time can vary due to file size)
- Go to the PST file location, and then open it using Excel to check the data.
- Restore the changes to the PowerShell (For security reasons) by running the following commands.
Set-ExecutionPolicy -ExecutionPolicyRestricted
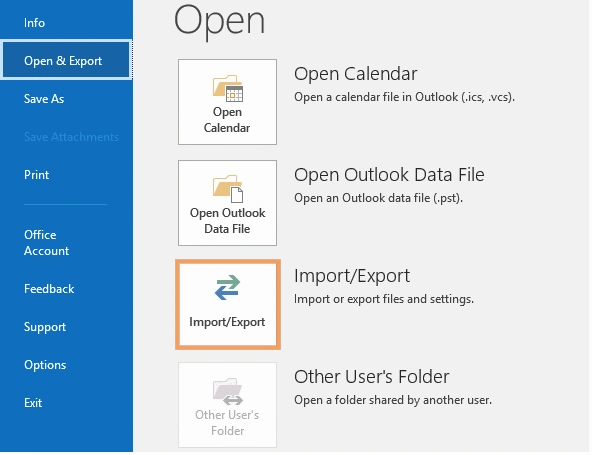
Convert OST to PST using Microsoft Outlook
With this, you can the native Outlook application features to convert your OST files into PST files.
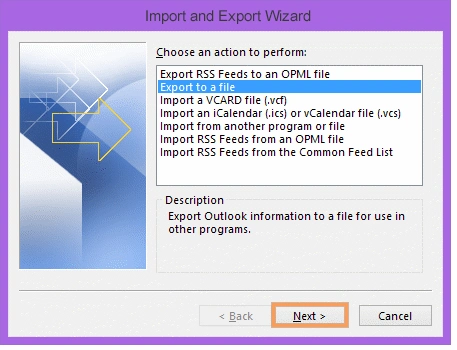
- Open the Microsoft Outlook application and click on the File Tab.
- Click on the Import/Export icon.
- Choose the Export a File from the list and then click on Next.
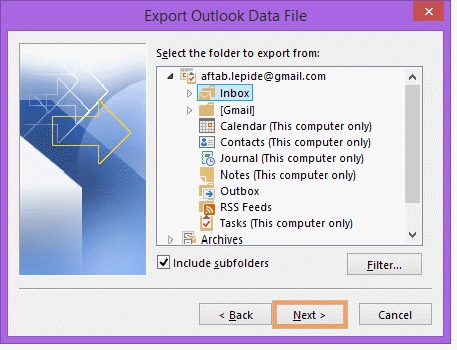
- Now, select the Outlook Data File (.pst) from the list and click Next again.

- Choose the location to save your file.
- And finally, click on the Do not export duplicate files option and click on Finish.
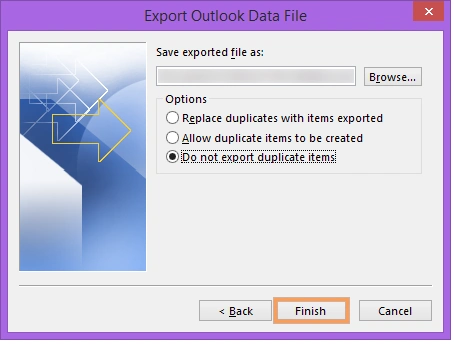
- Once the export is complete, you will now have a fully exported PST file on your screen. (It includes all the information from the OST file)
Use an online tool for OST to PST Conversion
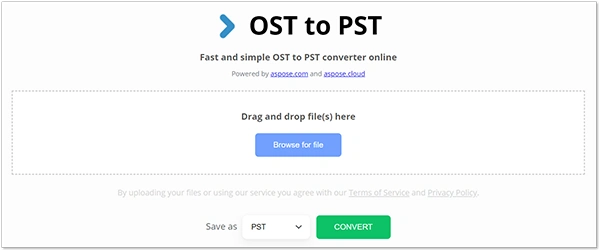
There are many tools and web apps available for OST to PST conversion online.
Most of these tools have very limited functionality, but they are also available for free.
Please do your research on which tools or sites to trust before uploading your confidential and private OST files to it.
Convert OST to PST File for Office 365
NOTICE: This is a multi-step process. Please follow these steps without missing any, or you may cause more damage to the OST file.
Step 1. Removing Any File Encryption
- Open the Microsoft Outlook application.
- Make sure that you are connected to the Office 365 account and that the syncing is active.

- Remove any encryption on the OST files by first clicking the File Tab>Options>Trust Center.
- Then select the Trust Center Settings.
- Navigate to the Encrypt Contents and Attachments for Outgoing Messages option and uncheck it.
- Now Exit the Microsoft Outlook application (Close it from running in the background too)
Step 2. Modifying the Mail Settings in the Control Panel
- Click on the Start menu, search for the “Control Panel” and open it.
- Adjust the View By options to Large Icons and look for the Mail (Microsoft Outlook) icon.
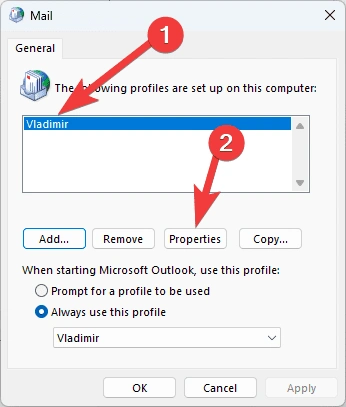
- Click on the Mail icon. Then inside the Mail Setup Window click on the Show Profiles option.
- Select the current Outlook profile from the list and then click the Properties button.
- Now click on the Email Accounts button inside the Mail Setup dialog box.
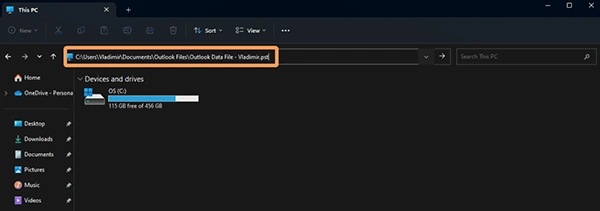
- Choose the Data Files Tab and copy the OST file location.
- Close all the dialog boxes.
Step 3. Convert the OST file into a PST file
- Open the Windows File Explorer on your Device.
- Now paste the OST File location Path you copied into the address bar.
- Find the OST file and rename it by changing the file extension from .ost to .pst.
- Now press Enter to save the new file name.
- Open the Microsoft Outlook application once again.
- Click on the File Tab>Open and Export. Then choose the Open Outlook Data File option.
- Find the location of your renamed PST file and then select it and click on OK to open it in Outlook.
Conclusion
The effective access and management of your mailbox is made easy by converting your OST to PST.
There are many techniques, methods, and tools available to make the conversion more accessible and easy.
Even users with no prior experience can easily restore data from broken OST files or create backups.
To ensure a seamless transition from OST to PST, pick the approach that best meets your needs.